How to force installation of Copilot on your PC?
Microsoft Copilot is a new feature that allows you to get personalized and contextual assistance from the American giant’s AI, and now you can integrate it into Windows 11. We will explain how.

Just a few months ago, Microsoft announced the integration of its Copilot AI directly into its Windows 11 operating system. However, European users are left out of this feature, as Microsoft has not yet received the necessary regulatory approvals to integrate AI in Europe.
fortunately, There is a solution that can allow you to easily use Copilot on any Windows 11 PC, whatever your region. All you need is a few minutes and a few simple steps.
How to install Copilot on Windows 11?
To install Copilot on your Windows 11 PC, just follow these steps:
Step 1: Create a shortcut to Copilot
The first thing to do is Create a shortcut that will launch Copilot on your PC. To do this, follow this procedure:
- Right-click on an empty space on your desktop or folder and select New > Shortcut.
- In the Enter item location box, type the following command: C:\Windows\explorer.exe “microsoft-edge:///ux=copilot&tcp=1&source=taskbar”. that Copilot will open in Microsoft Edge.
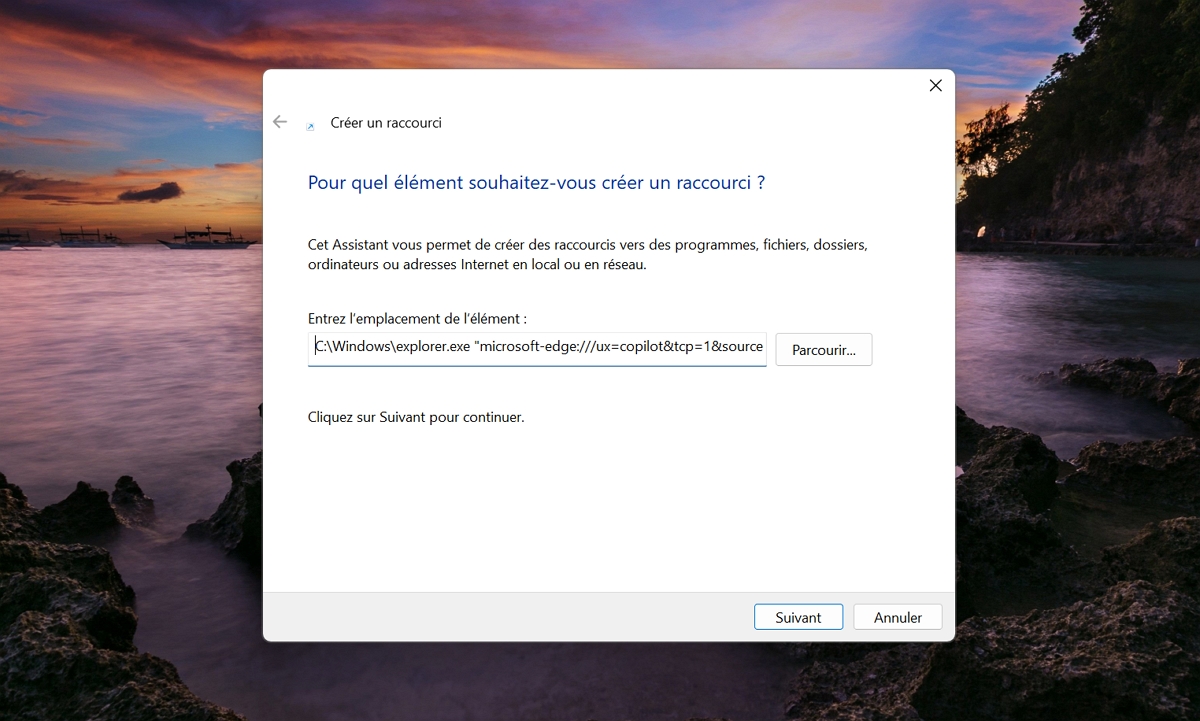
- Click above follows and name your shortcut. You can name it whatever you want, but for convenience, we’ll call it Copilot.
- Click above the end And you will see a new shortcut on your desktop or in your folder.
Step 2: Change the shortcut icon
is the next step Change the shortcut icon To make it more like a copilot:
- Right-click on the shortcut you created and select properties.
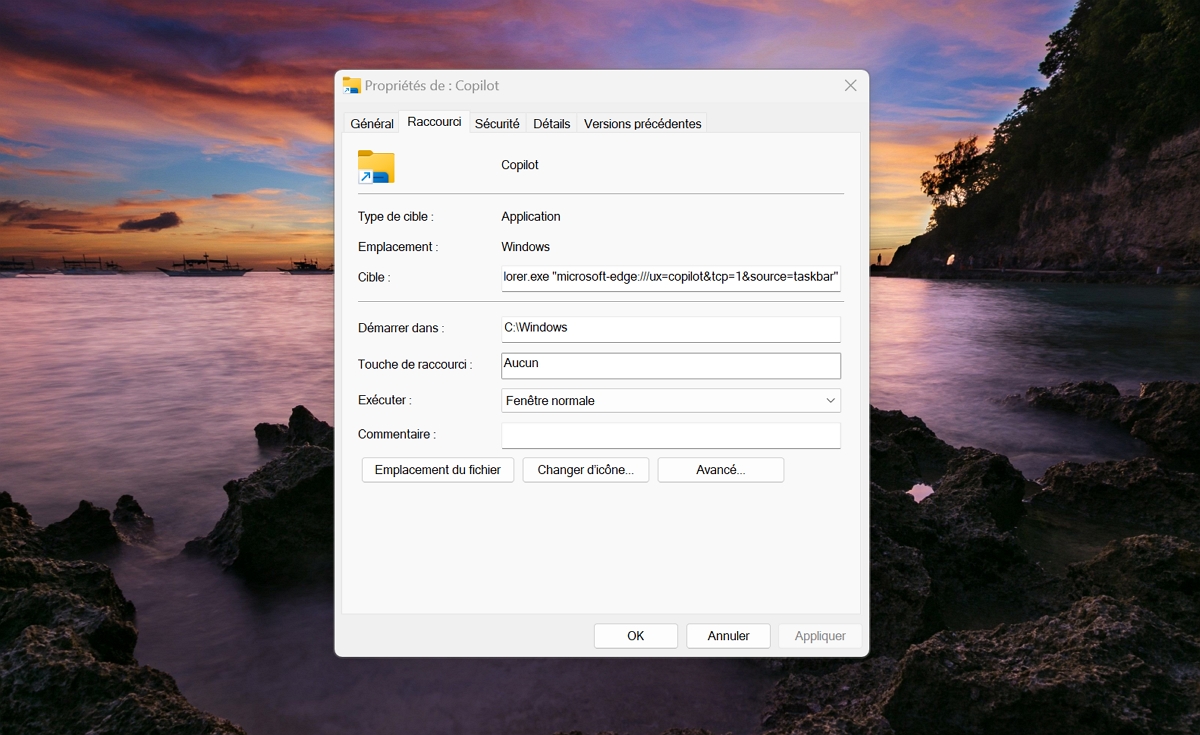
- Click the Shortcuts tab, then click the button Change icon.
- Click on the button Browse And find the icon file you want to use for the shortcut. You can download the official Copilot logo from the browser by searching for “. Copilot File Type: ico ” All you have to do is save the desired image on your PC.
- Select the icon file and click Open.
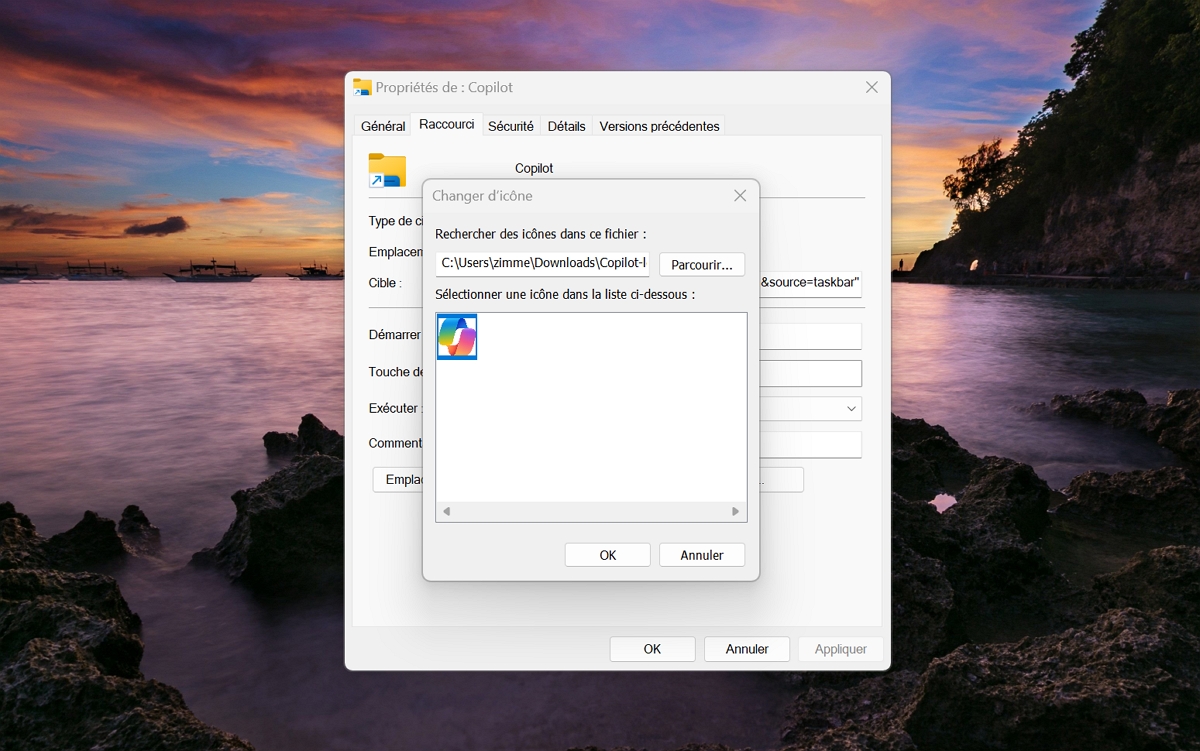
- Click OK twice and you will see it The shortcut now has a new icon.
Step 3: Pin the shortcut to the taskbar
This step contains Pin the shortcut to the taskbar So you can easily access Copilot from anywhere on your PC:
- Drag the shortcut you created to the taskbar at the bottom of your screen.

- A new icon representing Copilot appears in the taskbar.
- Now you can click the icon to launch Copilot at any time.
Step 4: Assign a keyboard shortcut to the shortcut
If you want to make using Copilot even easier, you can assign keyboard shortcuts to shortcuts you create. This will allow you to invoke the copilot with a single keystroke:
- Right-click on the shortcut you created and select properties.
- Click the Shortcuts tab, then click Box Shortcut key.
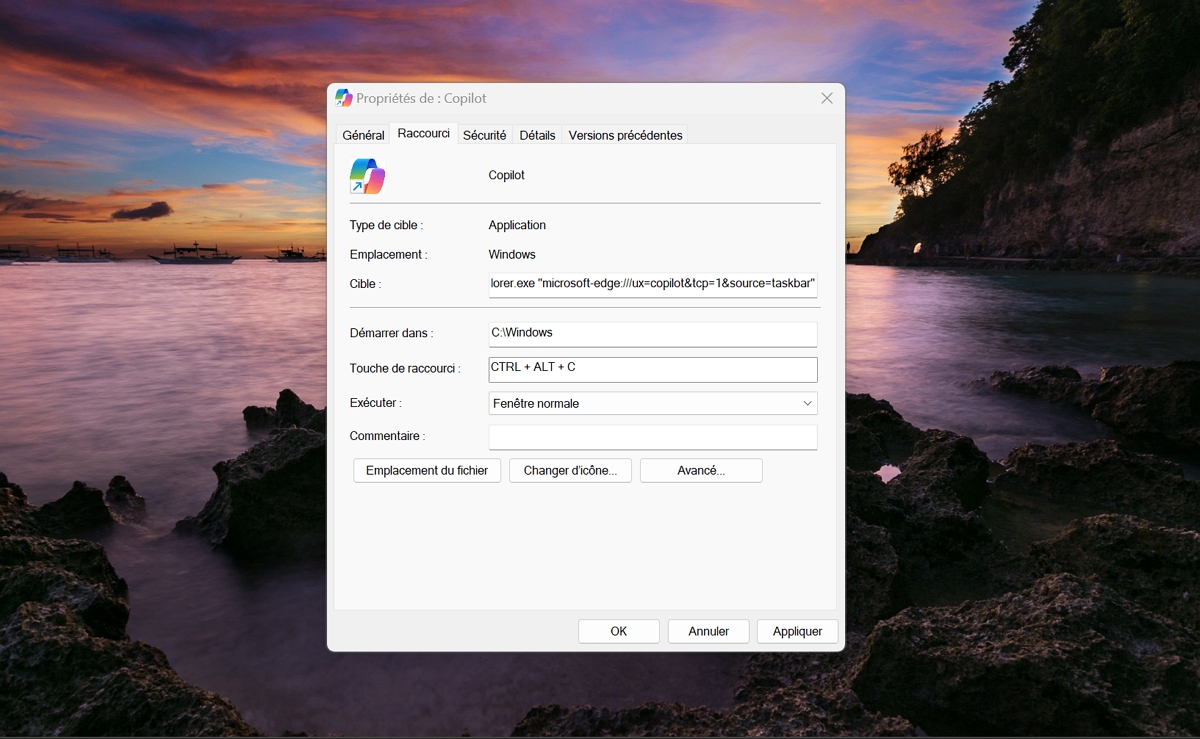
- Press the key combination you want Use to launch Copilot. For example, you can use Ctrl+Alt+C. Note that you cannot use the Windows key as part of a shortcut.
- Click OK and you will see that the shortcut key is assigned to the shortcut.
You can now use your chosen keyboard shortcut to launch Copilot at any time.

:quality(85)/cloudfront-us-east-1.images.arcpublishing.com/infobae/HOTX6R5ORVAQJFILTLIQ3N4A4Q.png)


